
[DISPLAY_ULTIMATE_SOCIAL_ICONS]
In the realm of modern telecommunications, fiber optic cables represent the backbone of global connectivity, enabling the rapid transmission of vast amounts of data over long distances with minimal loss. This technology has revolutionized the way we communicate, offering unparalleled bandwidth and speed that facilitate everything from high-speed internet connections to cloud computing and beyond. The inherent advantages of fiber optics, such as resistance to electromagnetic interference, higher security, and greater data carrying capacity, make it the preferred choice for network backbones, data centers, and broadband access networks around the world.
However, the superior performance capabilities of fiber optic cables are contingent upon their condition and integrity. Regular testing is crucial to ensuring that these cables operate at their optimal performance levels. Environmental factors, installation stresses, and physical damages can impair the functionality of fiber optics, leading to signal loss, degradation, and ultimately, network failures. Therefore, maintenance and troubleshooting through systematic testing become imperative to prevent downtime, maintain high-speed data transmission, and ensure network reliability.
Several types of tests are commonly conducted to assess and maintain the health of fiber optic networks. Continuity testing verifies that the fiber is intact and that light can pass through from one end to the other without any blockages. Loss measurement testing, on the other hand, quantifies the loss of signal strength as light travels through the fiber, which is crucial for evaluating the network’s efficiency. The Optical Time Domain Reflectometer (OTDR) test provides a more detailed analysis, offering insights into the location and nature of faults along the fiber path. Each of these tests requires specific tools and instruments, such as light sources, power meters, visual fault locators (VFL), and OTDRs, which are designed to diagnose and rectify problems, thereby ensuring the fiber network meets its performance criteria. Regular deployment of these testing methodologies not only safeguards the operational excellence of telecommunications infrastructure but also underpins the seamless flow of information in our digitally driven world.
Fiber Testing
Testing the integrity and performance of fiber optic cables is essential for maintaining the reliability and efficiency of telecommunications networks. There are several common methods used to assess various aspects of fiber optic performance, including continuity testing, insertion loss testing, return loss testing, and Optical Time Domain Reflectometer (OTDR) testing. Each of these methods serves a unique purpose and requires specific steps for execution and interpretation of results.
Continuity Testing
Continuity testing is the simplest form of fiber optic testing, designed to verify that light can travel through the fiber from one end to the other without obstruction. This test ensures that the fiber is intact and properly connected.
Steps for Continuity Testing:
- Use a visible light source, such as a fiber optic visual fault locator (VFL), and connect it to one end of the fiber.
- Observe the other end of the fiber for visible light emission. No light indicates a break or severe bend in the fiber.
- Mark any areas where light leakage occurs, indicating damage or imperfections.
Interpreting Results: A successful continuity test confirms the basic integrity of the fiber path. However, it does not measure the quality of the signal transmission or the presence of microbends and other issues that might affect performance.
Insertion Loss Testing
Insertion loss testing measures the loss of light power resulting from the insertion of a device or connection in the optical path. It’s crucial for determining the efficiency of fiber optic components and networks.
Steps for Insertion Loss Testing:
- Measure the baseline power level of the light source using an optical power meter.
- Connect the fiber optic cable and any components to be tested between the light source and the power meter.
- Measure the output power level.
- Calculate the insertion loss by subtracting the output power level from the baseline power level.
Interpreting Results: Insertion loss is expressed in decibels (dB). Lower values indicate better performance. The acceptable level of insertion loss depends on the specific application and standards being adhered to.
Return Loss Testing
Return loss testing assesses the amount of light that is reflected back towards the source, which can cause signal degradation. High return loss is desirable as it indicates less reflected light.
Steps for Return Loss Testing:
- Use a return loss meter or an optical time-domain reflectometer (OTDR) with a return loss measurement feature.
- Connect the device to the fiber optic cable or component under test.
- The device sends a signal down the fiber and measures the light reflected back.
Interpreting Results: Return loss is also measured in decibels (dB). Higher values indicate less reflection and better performance. This test is particularly important for applications where signal integrity is critical.
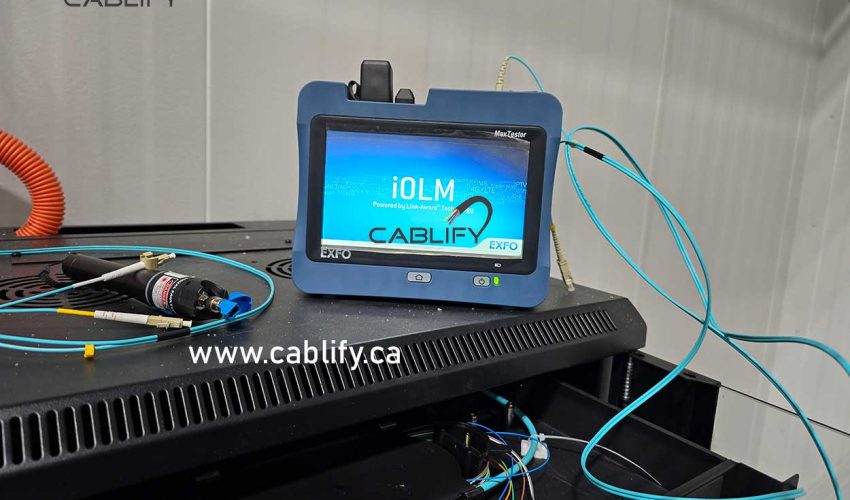
OTDR Testing
OTDR testing provides a comprehensive analysis of the fiber optic cable’s condition, identifying faults, splices, and connectors along the cable’s length. It can pinpoint issues that other tests might miss.
Steps for OTDR Testing:
- Connect the OTDR to one end of the fiber optic cable.
- The OTDR sends a series of light pulses into the fiber and measures the time and intensity of the light that is reflected back.
- The device creates a trace or graph that represents the fiber’s performance over its length.
Interpreting Results: The OTDR trace visualizes the fiber’s performance, with spikes indicating reflections from connections or faults. A flat, low line indicates good continuity, while losses are shown as dips. Analyzing the trace requires some expertise, as it involves distinguishing between acceptable and problematic reflections and losses.
Each of these testing methods plays a vital role in the maintenance and optimization of fiber optic networks. Continuity testing verifies the basic integrity of the fiber, while insertion and return loss testing measure the efficiency and reflectivity of the network components, respectively. OTDR testing offers a detailed analysis of the entire length of the fiber, identifying specific issues like breaks, bends, and poor connections. Together, these methods ensure that fiber optic networks can deliver the high-speed, reliable performance that modern telecommunications demand. Understanding how to perform these tests and interpret their results is crucial for professionals working in the field of fiber optics.
Essential Tools for Fiber Optic Testing
Choosing the right tools for fiber optic testing is critical for ensuring the accuracy of test results and the long-term reliability of fiber optic networks. The selection of tools depends on the specific testing requirements, budget constraints, and the level of detail needed in the analysis. Here’s an overview of essential tools for fiber optic testing, along with recommendations based on different needs and budget levels.
- Visual Fault Locator (VFL): A VFL is a basic tool used for continuity testing and identifying breaks or bends in fiber optic cables. It emits a visible laser light that travels through the fiber, highlighting faults where the light leaks.
- Benefits: Simple to use, inexpensive, and effective for identifying macrobends or breaks.
- Limitations: Cannot quantify loss or provide detailed information about the fault location beyond visual range.
- Optical Power Meter (OPM) and Light Source: These tools are used together for insertion loss testing. The light source sends a signal through the fiber, and the power meter measures the output at the other end.
- Optical Time Domain Reflectometer (OTDR): An OTDR provides a detailed analysis of the entire length of the fiber, identifying faults, splices, and connectors.
- Benefits: Offers comprehensive information about the fiber’s condition over its entire length.
- Limitations: More expensive and requires expertise to interpret the results correctly.
- Benefits: Accurate measurement of signal loss, essential for evaluating the performance of fiber optic components.
- Limitations: Requires matching wavelengths between the light source and the power meter for accurate measurements.
Recommendations Based on Budget and Testing Needs
- Entry-Level: For basic continuity checking and troubleshooting, a Visual Fault Locator and a simple optical power meter are sufficient. These tools are affordable and cover the fundamental needs of fiber optic testing.
- Mid-Range: For more detailed testing, including insertion and return loss measurements, adding a quality light source compatible with your power meter extends your testing capabilities. Mid-range OTDRs are also available for those needing more detailed analysis without the high cost of top-tier models.
- High-End: For comprehensive testing and analysis, especially in complex networks or for service providers, a high-end OTDR with advanced features, such as higher resolution, longer range, and sophisticated software, is essential. High-end power meters and tunable light sources offer the accuracy and flexibility needed for demanding applications.
Tips on Maintaining and Calibrating Testing Equipment
- Regular Calibration: Ensure your testing equipment is calibrated regularly according to the manufacturer’s recommendations. Calibration ensures accuracy and reliability in your test results.
- Proper Storage: Store your equipment in a clean, dry place to prevent damage and maintain its accuracy. Dust and moisture can affect the performance of fiber optic testing tools.
- Handling and Usage: Follow the manufacturer’s guidelines for handling and using your testing equipment. Mishandling can lead to inaccurate results or damage to the device.
- Software Updates: For tools that use software, such as OTDRs, keep the software updated to ensure you have access to the latest features and improvements.
Choosing the right fiber optic testing tools is a balance between your specific testing requirements, the level of detail needed, and your budget. By understanding the benefits and limitations of each tool and following best practices for maintenance and calibration, you can ensure accurate, reliable testing of your fiber optic networks.
Troubleshooting Common Fiber Issues
Troubleshooting common issues in fiber optic networks is a critical skill for ensuring the reliability and performance of these systems. Understanding how to interpret testing results and identify common problems enables technicians to quickly resolve issues that may arise. Here are insights into interpreting testing results, identifying common problems such as breaks, bends, and dirty connectors, and guidance on troubleshooting steps based on test outcomes, along with preventive measures to avoid these issues.
Interpreting Testing Results
Testing results from tools like OTDRs, power meters, and visual fault locators provide valuable data on the health of a fiber optic network. High loss readings, for example, might indicate problems like breaks, bends, or poor connections. Anomalies in OTDR traces, such as sudden spikes or dips, can also signal issues that need further investigation.
Identifying Common Problems
- Breaks: Sudden loss of signal or a significant increase in insertion loss can indicate a break. An OTDR trace will show a sharp drop, pinpointing the location.
- Bends: Excessive bending of fiber cables can cause microbends or macrobends, leading to increased attenuation. This might be identified by a gradual increase in loss over a certain segment.
- Dirty Connectors: Contamination on connector faces is a common issue that leads to signal loss. Visual inspection or a power meter reading lower than expected can indicate dirty connectors.
Troubleshooting Steps
- For Breaks:
- Use an OTDR to localize the break.
- Visually inspect the identified area for physical damage.
- Repair or replace the damaged section as necessary.
- For Bends:
- Inspect the cable route using a visual fault locator to pinpoint areas where the cable may be excessively bent.
- Reroute or relax the bend radius to alleviate stress on the fiber.
- For Dirty Connectors:
- Inspect connectors with a fiber optic microscope to confirm dirt or damage.
- Clean the connectors using appropriate fiber cleaning tools and techniques.
- Re-test to ensure the issue is resolved.
Preventive Measures
- Regular Inspection and Maintenance: Schedule regular visual inspections and cleanings of connectors to prevent buildup of contaminants that can degrade performance.
- Proper Installation Practices: Ensure that fiber optic cables are installed with appropriate bend radiuses and are protected from physical stress to prevent breaks and bends.
- Use of Protective Enclosures: Utilize protective enclosures and cable management systems to safeguard fibers from environmental hazards and physical damage.
- Training and Awareness: Ensure that personnel are trained on the importance of proper handling and maintenance of fiber optic components to minimize the risk of damage and degradation over time.
By following these guidelines for interpreting testing results, troubleshooting common issues, and implementing preventive measures, technicians can maintain the integrity and performance of fiber optic networks. Addressing issues promptly and effectively not only ensures reliable operation but also extends the lifespan of the fiber optic infrastructure.
Best Practices for Fiber Optic Testing
Adhering to best practices for fiber optic testing is crucial for maintaining the integrity, performance, and longevity of fiber optic networks. Regular testing and maintenance schedules are essential, not only for identifying and rectifying immediate problems but also for predicting and preventing future issues. Here’s a look into the importance of these practices, guidelines for conducting accurate and reliable tests, and the significance of keeping detailed records.
Importance of Regular Testing and Maintenance
Regular testing and maintenance of fiber optic networks help ensure that they operate at optimal efficiency. This routine process helps in early detection of issues such as signal loss, physical damage, or wear and tear that could potentially disrupt the network. Scheduled maintenance reduces downtime by allowing for the timely resolution of issues before they escalate into more significant problems.
Guidelines for Accurate and Reliable Testing
- Cleaning Connectors: Before any testing, it’s vital to clean the connectors. Dirt, dust, and other contaminants can cause loss and reflection issues. Use proper cleaning tools and techniques to ensure that connectors are free from contaminants.
- Avoiding Common Errors: Ensure that all testing equipment is correctly calibrated and in good working order. Be mindful of common testing errors, such as incorrect setting of testing parameters or misinterpretation of test results. Understanding the limitations and correct usage of testing instruments is crucial.
- Consistency in Testing Procedures: Follow standardized testing procedures to ensure consistency in test results. This includes using the same wavelengths, power levels, and measurement techniques during each test.
- Proper Use of Tools: Utilize the appropriate tools for each type of test. For example, use an OTDR for distance and loss measurement and a power meter and light source for insertion loss testing. Understanding the specific application of each tool ensures more accurate and reliable results.
Keeping Detailed Records
Maintaining detailed records of all tests conducted is vital for several reasons:
- Historical Data: It provides a historical record of the network’s performance over time, allowing for trend analysis.
- Future Reference: Detailed records help in comparing current test results with past data to identify changes or new issues.
- Problem Resolution: It aids in diagnosing and resolving issues more efficiently by providing a baseline against which changes can be measured.
Documenting specific details such as the date of the test, the equipment used, test results, and any corrective actions taken is essential for effective fiber optic network management.
By adhering to these best practices for fiber optic testing, network operators can ensure the reliability and longevity of their fiber optic infrastructure, thereby minimizing downtime and optimizing performance.