

Electrical Metallic Tubing (EMT) is the lightweight champion of electrical conduits, offering durability without the bulk. Made from galvanized steel or aluminum, EMT stands out for its ease of manipulation (cutting, bending, assembling) making it a popular choice among electricians for various installations. It’s like the Swiss Army knife of conduits – versatile, reliable, and always handy.
Understanding EMT and Its Applications

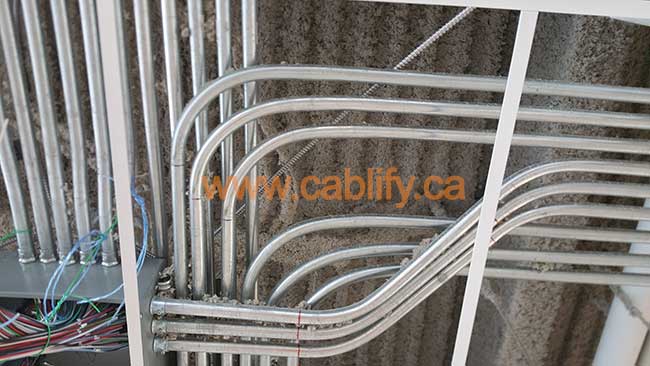
From the bustling floors of commercial buildings to the controlled chaos of factories, and even within the serene confines of residential structures, EMT is everywhere. Its role? To shield electrical wires from physical harm and environmental threats like moisture and corrosion, all while being visible yet unobtrusive. EMT is the unsung hero in locations where exposed wiring is permissible and protection is paramount.
What is EMT?
Electrical Metallic Tubing (EMT) is the lightweight champion of electrical conduits, offering durability without the bulk. Made from galvanized steel or aluminum, EMT stands out for its ease of manipulation (cutting, bending, assembling) making it a popular choice among electricians for various installations. It’s like the Swiss Army knife of conduits – versatile, reliable, and always handy.
Also read:
EMT vs Rigid vs IMC Conduit for Commercial Buildings
Applications of EMT

From the bustling floors of commercial buildings to the controlled chaos of factories, and even within the serene confines of residential structures, EMT is everywhere. Its role? To shield electrical wires from physical harm and environmental threats like moisture and corrosion, all while being visible yet unobtrusive. EMT is the unsung hero in locations where exposed wiring is permissible and protection is paramount.
Interesting Facts about EMT:
-
-
- Recyclability: EMT is made from materials that are 100% recyclable, which makes it an environmentally friendly choice.
-
- Non-Magnetic Properties: For installations requiring non-magnetic properties, such as in MRI rooms, aluminum EMT is used instead of steel to avoid magnetic interference.
- Color Coding: While typically metallic, EMT can be color-coded using special paints or coatings to indicate different power systems or to blend into architectural designs.
-
EMT’s versatility in application stems from its combination of durability, ease of use, and protective features, making it a preferred choice for a wide array of electrical installations.
Tools and Materials
-
- Conduit Bender: This tool is crucial for achieving precise bends in the conduit, ensuring that the pathways fit correctly within the building’s structure without straining the wires or the conduit itself. Advanced benders come with markings for various angles, allowing for quick adjustments and consistent results.

-
-
- Hacksaw: Used to cut the EMT to specific lengths, a good hacksaw should have a blade fine enough to ensure a clean cut without deforming the tube. Blades are replaceable, so keeping extras on hand is advised to maintain efficiency.
-
- Conduit Reamer: After cutting EMT, burrs can form inside the edges of the tubing. A conduit reamer cleans these out, ensuring the interior surface is smooth. This prevents damage to the wires as they are pulled through and reduces the risk of wire insulation being scraped, which could lead to electrical hazards.
-
- Screwdrivers, Wire Puller, and Measuring Tape: Essential for assembly and installation.
-
- Torpedo Level: Ensures that the conduits are installed horizontally or vertically to meet professional standards and code requirements. This tool is particularly useful when precision is crucial, such as in visible areas or where multiple runs parallel each other.
-
- EMT Cutter: For cleaner cuts without the need for deburring, an EMT cutter can be a more efficient alternative to a hacksaw, particularly for larger projects.
-
- Tubing Cutter: This tool can be used instead of a hacksaw for smaller diameter EMT, offering a quicker, cleaner cut that is less likely to deform the tube.
- Pliers and Adjustable Wrench: These tools are useful for twisting, pulling, and securing various components during the installation. Pliers, especially, are vital for bending small conduit pieces, manipulating wires, and gripping or twisting metal parts.
-
Materials and Accessories
When setting up a project involving Electrical Metallic Tubing (EMT), selecting the appropriate materials and accessories is crucial for ensuring the system’s effectiveness, safety, and durability. Here’s a more detailed exploration of the types of materials and accessories used in EMT installations:
EMT Sizes and Types

-
-
- Sizes: EMT comes in various diameters, typically ranging from 1/2 inch to 4 inches. The size needed depends on the number of wires that need to be enclosed and the amount of current they will carry. Here is the link to our popular article on Cat6 EMT Fill Guide
- Types: Standard EMT is usually made from steel, which is durable and offers significant protection. Aluminum EMT is lighter, which may be advantageous in certain installations where weight is a concern.
-
Fittings
-
-
- Connectors: These are used to join EMT to electrical boxes, enclosures, or other lengths of tubing. Connectors can be set-screw, compression, or push-in types, each offering different levels of security and ease of installation.
- Couplings: Similar to connectors but used to connect two lengths of EMT directly together. They also come in set-screw and compression types.
-
Mounting Accessories
-
-
- Straps and Hangers: These accessories secure EMT to surfaces such as walls, ceilings, or frames. Straps wrap around the EMT and attach to the mounting surface with screws. Hangers provide a hanging point for the EMT, useful in overhead installations.
- Clamps: Offer a secure way to hold EMT in place, especially where multiple conduit runs are parallel or where EMT is exposed to vibration.
-
Safety and Performance Enhancements
-
-
- Locknuts: Secure the connectors and couplings in place and ensure a tight fit to prevent the EMT from moving or pulling away from its connection points.
- Bushings: Inserted at the ends of the conduit where wires exit, bushings protect wires from being nicked or damaged by sharp edges.
-
Considerations for Specific Environments
-
-
- Corrosion-resistant coatings: In environments where corrosion is a risk, such as outdoor or industrial settings, EMT can be specified with additional corrosion resistance to extend its lifespan.
- Color-coded EMT: Some EMT is available in different colors, which can be used to identify different circuits or to blend with the environment for aesthetic purposes.
-
Choosing the correct combination of EMT, fittings, and mounting accessories is not just about physical fit; it also involves understanding the electrical and environmental requirements of the installation. This ensures that the system not only fits together neatly but also operates safely and efficiently over its lifespan.
Pre-Installation Planning
Before diving into the installation, take a moment to survey your battlefield. Understanding the terrain (installation site) helps plan the most effective route for the conduit, spot potential challenges, and decide on the necessary types and amounts of fittings. A well-scouted site leads to a smoother installation process.
Calculating Bends and Lengths

Accurate calculation of bends and lengths in conduit installation is not just about ensuring functionality—it also impacts safety and aesthetics of the final setup. Here’s an expanded discussion on these elements that are crucial for any electrical installation using Electrical Metallic Tubing (EMT):
Importance of Precise Measurements
-
-
- Avoiding Excess: Over-measurement can lead to excess conduit, resulting in unnecessary costs and a cluttered installation. Conversely, under-measurement can cause shortages, requiring additional pieces and connections that could compromise the integrity of the electrical protection.
- Space Optimization: In environments where space is at a premium, such as in commercial buildings or industrial settings, maximizing the use of space through precise conduit measurement is critical.
-
Tools for Measuring and Calculating
-
-
- Conduit Measuring Tape: Unlike traditional tape measures, a conduit measuring tape accounts for the entire length of the run, including bends and twists, directly on the tape, facilitating more accurate installation.
- Angle Measurer or Inclinometer: Used for determining exact angles needed for bends, ensuring that conduits fit precisely without unnecessary stress on the connections.
-
Techniques for Marking and Planning
-
-
- Detailed Blueprints: Before physical installation begins, detailed blueprints should be prepared, showing the path of the conduit runs. This allows for pre-calculation of lengths and bends.
- Marking Tools: Using chalk lines or markers for straight runs and specialized templates or markers for bends ensures accuracy during the cutting and bending process.
-
Calculating Bends
-
-
- Bend Deduction Charts: Most benders come with charts that show how much extra conduit is needed to accommodate a bend. These charts help in determining the total length of conduit required for an installation.
- Bending Software: For complex installations, software can be used to calculate precise bend angles and cumulative lengths, incorporating allowances for material spring back and bend radius.
-
Best Practices
-
-
- Factor in Expansion and Contraction: Conduits may expand or contract based on temperature changes. Always leave a small amount of slack or use expansion fittings to accommodate these changes.
- Continuous Runs: Whenever possible, plan for the fewest number of joints and cuts. This reduces potential points of failure and maintains the integrity of the protective barrier around the electrical wiring.
-
Training and Experience
-
-
- Hands-on Training: Proper training in using bending tools and measuring equipment is crucial. Many trade schools and apprenticeship programs offer courses specifically focused on conduit installation.
- Experience Sharing: Learning from experienced professionals through workshops or on-the-job training can provide invaluable insights into efficient measuring and bending techniques.
-
Implementing these strategies not only ensures a seamless and safe EMT installation but also enhances the efficiency and professionalism of the work conducted, reflecting well on the skills of the electricians involved.
When working with Electrical Metallic Tubing (EMT), the cutting and bending processes are key to ensuring a professional installation. Here’s a detailed look at these important steps:
Cutting EMT
-
-
- Choose the Right Tool: While a hacksaw is commonly used for cutting EMT, a tubing cutter can provide a cleaner, squarer cut with less effort and no burring.
-
- Measure Accurately: Before cutting, measure the required length of EMT using a measuring tape. Mark the tube where the cut needs to be made, ensuring the measurement is precise to avoid waste and ensure the conduit fits perfectly in the intended space.
-
- Secure the Tubing: Ensure that the EMT is securely clamped down before cutting. This prevents it from moving and results in a straighter cut.
- Cutting Technique: If using a hacksaw, make the cut in a steady, straight motion. If using a tubing cutter, rotate the tool around the tube until it slices through the metal.
-
Bending EMT
-
-
- Selecting a Bender: Conduit benders come in different sizes to accommodate various diameters of EMT. Choose a bender that matches the size of your conduit to avoid damaging the tubing.
-
- Marking Bends: Measure and mark the point on the conduit where the bend is needed. This ensures the bend will be placed correctly in the overall layout of the installation.
-
- Use a Bending Chart: Most benders have angle markings on them, but using a bending chart can help calculate the exact spot to place the bender in relation to the mark you made on the conduit. This is essential for achieving precise angles.
-
- Make the Bend: Align the bender with the mark on the conduit and apply pressure smoothly and steadily. Check the angle frequently to ensure it matches the requirements for your installation.
-
- Check Alignment: After making the bend, it’s important to ensure that the conduit still aligns correctly with the rest of the installation plan. Misaligned bends can lead to problems with fitting the conduit into boxes and couplings.
- Re-bending: Avoid re-bending EMT as it weakens the metal. If a bend is incorrect, it’s usually better to start with a new piece of conduit.
-
Tips for Precision and Efficiency
-
-
- Lubricate the Cutter Wheel: If using a tubing cutter, periodically lubricate the cutting wheel to keep it sharp and ensure a clean cut.
- Practice: If you’re new to bending conduit, practice on scrap pieces to get a feel for the amount of pressure needed and how the metal behaves.
-
By mastering these techniques, electricians can ensure that their EMT installations are not only aesthetically pleasing but also meet all safety and functionality standards. Proper cutting and bending minimize material waste and enhance the overall efficiency of the project.
Assembly and Installation
Like a puzzle, EMT sections fit together with the help of couplings and connectors. Ensuring a secure and tight fit is crucial, especially if the assembly faces environmental challenges outdoors.
Securing EMT to Surfaces
EMT needs to be securely fastened to walls, ceilings, or floors usingstraps, hangers, or clamps, ensuring stability and adherence to safety standards. The spacing of these supports is crucial and should comply with the National Electrical Code (NEC) requirements.
Pulling Wires Through EMT
Ensuring that the conduit is clean, free of burrs, and ready for wire pulling is an essential preparatory step. This prevents damage to the wires and ensures a smooth installation.
Techniques for Efficient Wire Pulling
Using tools like fish tape, the wires are gently pulled through the EMT. In cases of long runs or tight bends, wire lubricant can be used to ease the process.
Maintenance and Troubleshooting
Regular inspections help in identifying potential issues such as corrosion, physical damage, or loose fittings, ensuring that they are addressed promptly to maintain the integrity of the electrical system.
Troubleshooting Common Issues
Developing the skill to quickly identify and resolve common issues ensures the longevity and safety of the EMT installations. This includes addressing issues like water accumulation in outdoor installations or repairing damaged sections of the conduit.
Safety and Compliance
Always prioritize safety. Use personal protective equipment, follow best practices, and ensure that all installations are up to code.
Ensuring Code Compliance
Staying updated with the NEC and local codes ensures that all EMT installations are compliant, safe, and efficient for the Electrical Services.
Mastering the art of EMT installation is a journey of continuous learning, practice, and a sprinkle of creativity. By adhering to best practices, staying informed, and honing your skills, you ensure that your EMT installations are not only effective and efficient but also a testament to your craftsmanship and dedication to electrical safety.
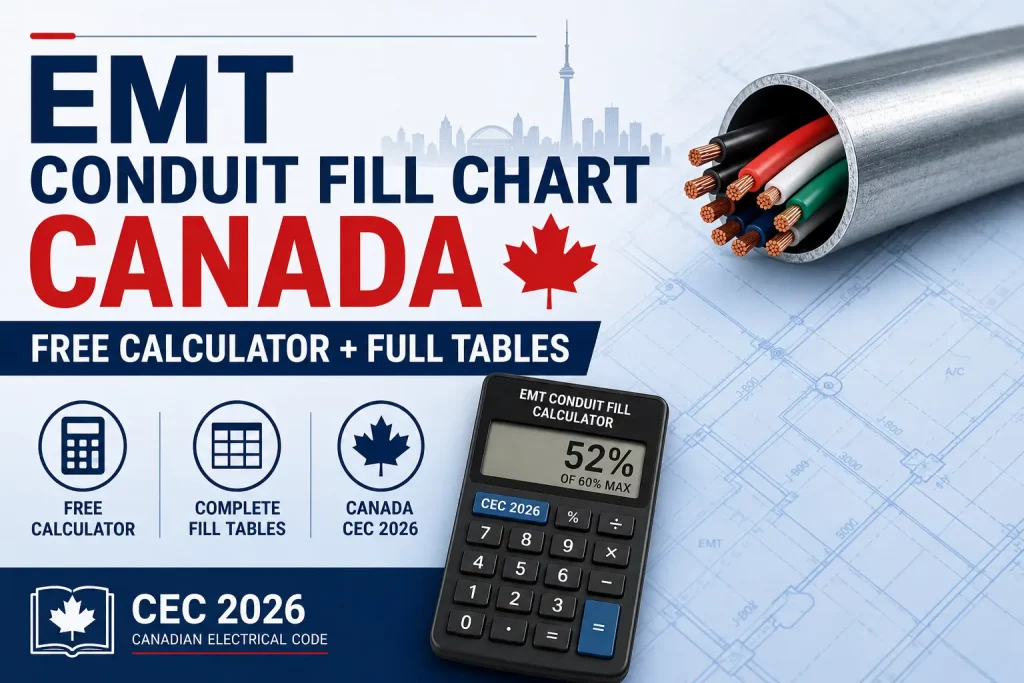
EMT Conduit Fill Chart Canada, Free Calculator + Full Tables (CEC 2026)
Canada’s most complete EMT conduit fill chart. Free interactive calculator, full THWN/RW90 tables for EMT, PVC & RMC, CEC Rule 12-910 compliant. Download PDF free.
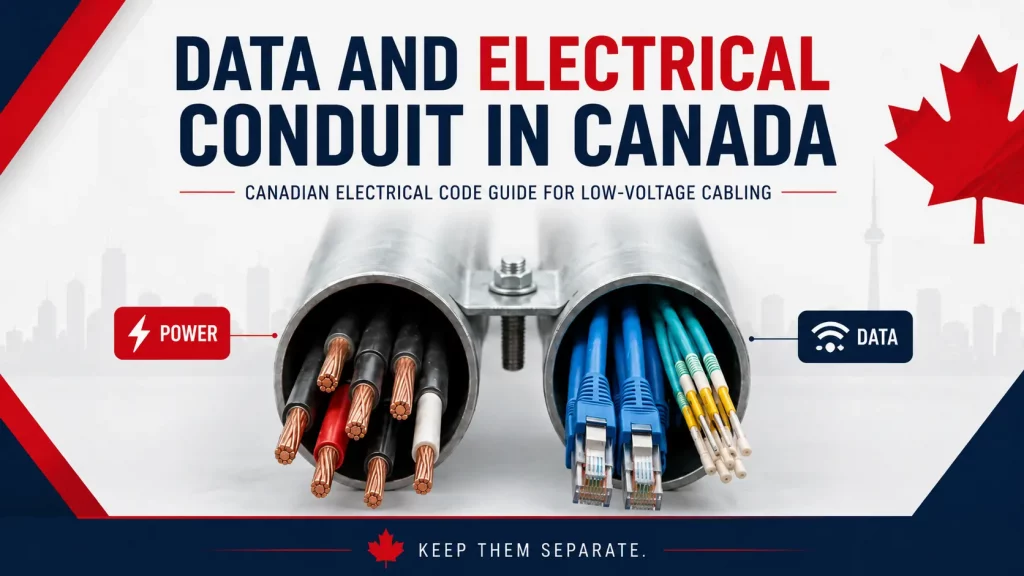
Data and Electrical Conduit in Canada: Canadian Electrical Code Guide for Low-Voltage Cabling
Can data cables and electrical wiring run in the same conduit in Canada? In most commercial installations, the safest and cleanest answer is no. This guide explains how the Canadian Electrical Code treats power, communication, low-voltage, fiber, Cat6, and conduit separation.
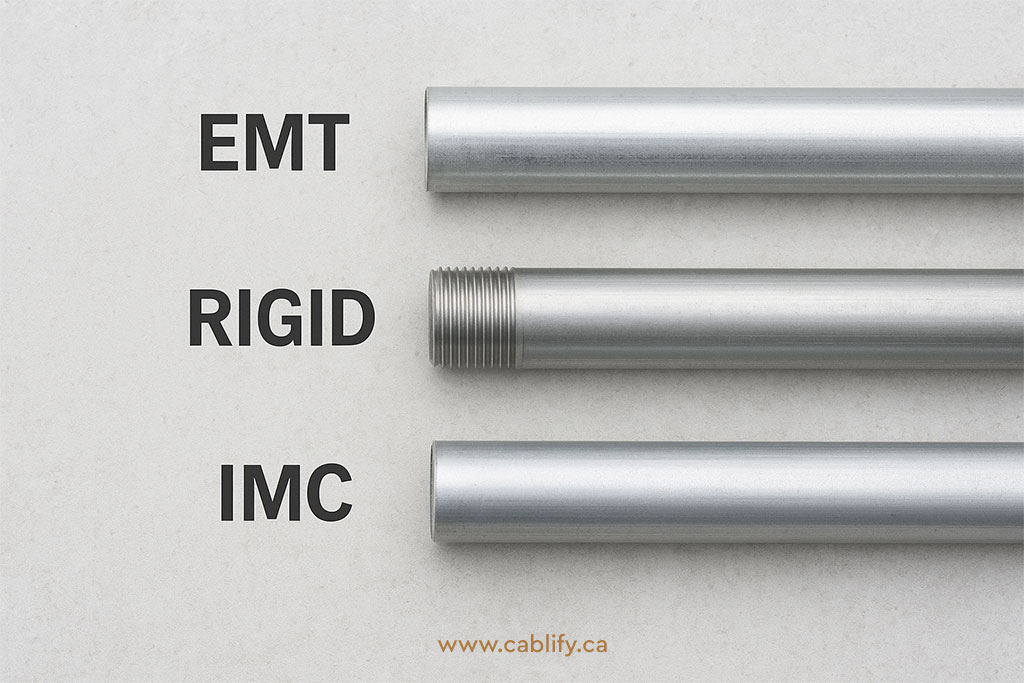
EMT vs Rigid vs IMC Conduit for Commercial Buildings
EMT vs Rigid vs IMC Conduit: Choosing the Right One for Commercial Buildings
Guide to Rigid Conduit
Rigid conduit plays a critical role in electrical systems, providing protection for wiring and ensuring safe, reliable, and durable installations. This comprehensive guide covers everything you need to know about rigid conduit, from the basics of what it is, to types, specifications, benefits, installation best practices, and more. We will also include tables and charts [...]
Conduit Fill Guide for Data cables
If you are an electrical contractor, IT installer, or network engineer, choosing the wrong conduit size can turn a simple cable pull into a nightmare of snags, deformed jackets, and failed certification tests. This conduit fill guide for data cables answers the practical question on every job site: how many Cat5e, Cat6, or Cat6A cables [...]