

Relocating IT infrastructure is a complex task that requires planning, documentation, and technical expertise. A poorly executed move can cause extended downtime, data loss, and unnecessary costs. A well-executed move, on the other hand, ensures business continuity and peace of mind for both IT teams and employees.
This guide outlines every stage of an IT relocation, focusing on server rack moves, desktop transitions, and network equipment reinstallation.
✅ Phase 1: Pre-Move Assessment
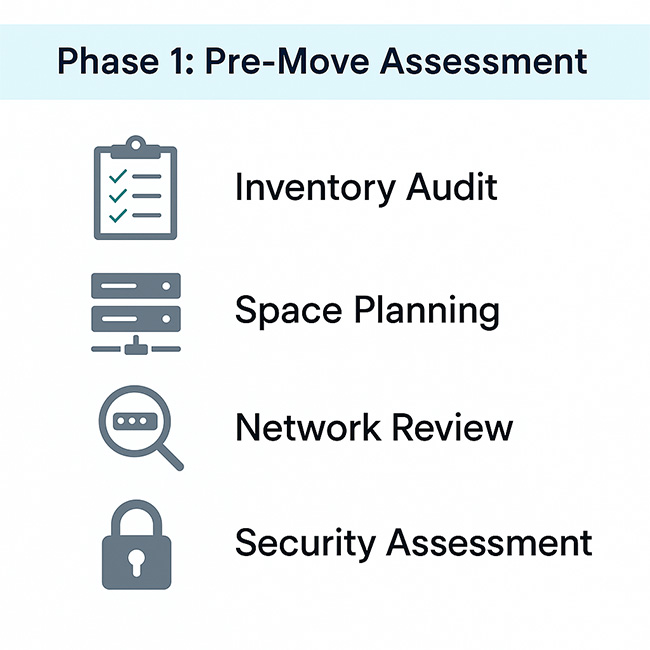
The foundation of a successful IT relocation is a detailed pre-move assessment. This stage helps avoid surprises and ensures that both the source and destination environments are ready.
Equipment Inventory
Before moving, you need a full inventory of all IT assets. This includes servers, storage devices, network switches, firewalls, wireless access points, VOIP phones, desktops, and even patch panels. An accurate inventory prevents misplaced equipment and ensures everything is accounted for at the new site.
-
-
- List each device with serial numbers and asset tags.
-
- Record configuration details, especially for firewalls, routers, and switches.
- Map physical rack positions to ensure a smooth rebuild later.
-
Example: A financial firm in Toronto avoided a week-long delay by discovering in the inventory stage that several core switches had end-of-life support and needed upgrades before relocation.
Site Survey at the New Location
The new site must be ready to host your IT equipment. Conduct a site survey to confirm the space, power, cooling, and internet capacity align with your current and future needs.
-
-
- Verify the number of racks and rack dimensions.
-
- Check power availability, including UPS and generator backup.
-
- Confirm HVAC systems support data center cooling loads.
- Ensure fiber and copper cabling is properly terminated and tested.
-
Without this step, you risk installing equipment into an environment that cannot support it, leading to overheating, unstable power, or poor connectivity.
Downtime and Scheduling
Relocating IT means downtime. Planning when and how long systems will be offline is critical. Choose maintenance windows that least affect business operations.
-
-
- Communicate the downtime plan to all stakeholders.
-
- Ensure backups are complete and verified before the move.
- Set up temporary services, if possible, to minimize disruption.
-
Example: A healthcare company aligned its relocation with a holiday weekend, reducing the downtime impact on patient services.
ISP and Network Readiness
Internet services often become the hidden bottleneck. Confirm with your ISP that circuits are installed, tested, and live at the new location well in advance.
-
-
- Test primary and backup connections.
-
- Validate firewall and VPN configurations at the new site.
- Confirm bandwidth capacity matches business demand.
-
Skipping this step is a common mistake. Many businesses arrive at their new office only to realize the internet is not ready, causing days of downtime.
✅Phase 2: Preparation and Labeling
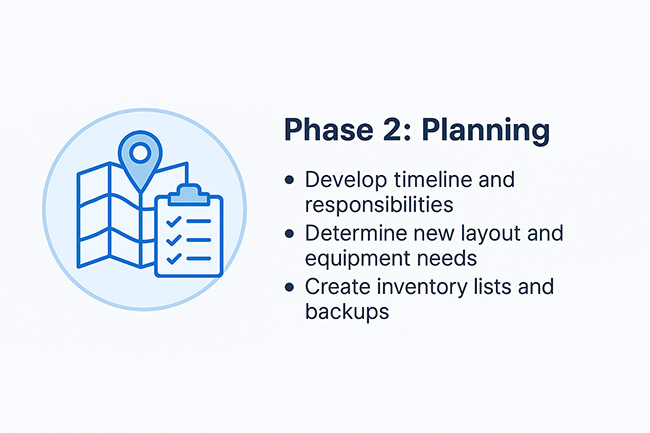
The preparation phase is where you transform planning into actionable steps. It ensures your equipment is ready to be physically moved without confusion, misplacement, or risk of damage. One of the most underestimated tasks in IT relocation is labeling, yet it is often the single factor that determines whether a move finishes in hours or drags on for days.
Backup and Data Protection
Before handling any hardware, confirm all critical data is backed up. A server or storage unit damaged in transit can be replaced, but the data on it might not be recoverable without proper backups.
-
-
- Perform full system backups and test recovery processes.
-
- Use both on-premises and cloud backup solutions.
-
- Encrypt sensitive data before transport.
- Document backup locations for quick access if recovery is needed.
-
Example: A law firm relocating its servers discovered a failed drive during the move. Thanks to verified backups, all case files were restored within hours, preventing legal disruptions.
Equipment Labeling
Every piece of equipment must be labeled in a way that links it to both its original location and its destination. This makes reinstallation faster and reduces the chance of mistakes.
-
-
- Label network cables on both ends (patch panel to device).
-
- Use durable, heat-resistant labels that will not fall off during transport.
-
- Assign rack unit (RU) positions for servers, switches, and PDUs.
- Color-code labels for fiber, copper, and power connections.
-
A well-labeled server rack rebuild can save hours of troubleshooting, especially when dealing with complex cross-connects.
Cable Management Before the Move
Cables are often overlooked, but they cause the biggest delays if not properly prepared. Tangled or unlabeled cables lead to confusion during reinstallation.
-
-
- Remove unused or legacy cables before the move.
-
- Coil and secure active cables with Velcro ties.
-
- Photograph current cable layouts for reference.
- Prepare a cable map for the new site.
-
This step alone reduces errors when reconnecting critical uplinks like firewall-to-core switch connections.
Packing and Protection
Server racks, switches, and storage devices are sensitive to vibration and static. Proper packing prevents damage and ensures the hardware arrives in working condition.
-
-
- Use anti-static covers for servers and desktop PCs.
-
- Secure rack-mount equipment with transport rails or remove it for safer handling.
-
- Transport hard drives and SSDs in padded cases.
- Pack monitors and desktops with bubble wrap or foam inserts.
-
Example: A company that skipped anti-static protection during a winter move in Montreal faced multiple motherboard failures due to static discharge. Proper packing would have prevented this.
Documentation and Move Kits
Relocation is smoother when technicians have everything they need at hand. A move kit ensures you don’t waste time looking for tools or supplies during reinstallation.
-
-
- Document rack diagrams and IP address maps.
-
- Include screwdrivers, spare cables, patch cords, Velcro ties, and power cords.
-
- Keep copies of configuration backups offline and accessible.
- Assign responsibility for handling documentation during the move.
-
✅Phase 3: Physical Move and Transport
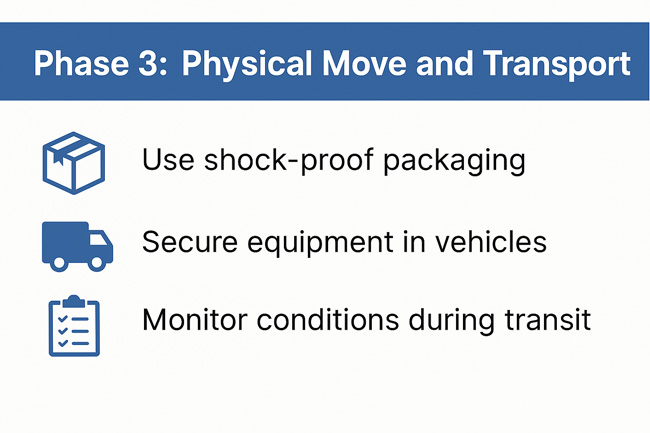
This is the most delicate part of any IT relocation. Servers, switches, firewalls, and storage devices are expensive, fragile, and mission-critical. A single mistake during transport can cause downtime or permanent data loss. The physical move phase focuses on safe handling, controlled logistics, and secure transit to ensure your IT infrastructure arrives intact and ready for reinstallation.
Moving Server Racks
Server racks are large, heavy, and packed with sensitive equipment. Handling them requires planning and professional movers with IT relocation experience.
-
-
- Decide on transport method: Either move racks fully populated with secured rails or dismount equipment for separate packing.
-
- Secure equipment: Use transport brackets, shock absorbers, or rails to prevent vibration damage.
-
- Lift with care: Always use professional lifting tools, dollies, and rack lifters to avoid injury and equipment strain.
- Protect airflow panels and doors: Keep rack panels in place or wrap securely to prevent bending.
-
Example: A Toronto-based financial firm removed all servers from racks for separate padded cases. This slowed the move but prevented thermal damage from rack misalignment.
Transporting Desktops and Workstations
Unlike servers, desktops and workstations are easier to move but still need structured packing to prevent confusion at the destination.
-
-
- Label per user/department: Assign each desktop and monitor to its user, tagged with workstation number.
-
- Bundle with accessories: Keep keyboards, mice, and cables with the correct desktop in sealed bags.
-
- Protect monitors: Use foam inserts or monitor boxes to avoid screen cracks.
- Secure fragile devices: Laptops, tablets, and thin clients should be placed in shockproof cases.
-
When desktops are correctly labeled and packed, employees can resume work immediately after reinstallation, reducing productivity loss.
Network Equipment Transit
Switches, routers, firewalls, and wireless controllers are often the most sensitive hardware in an IT move. They control connectivity and security, so their protection is critical.
-
-
- Anti-static protection: Use anti-static bubble wrap and bags to prevent electrostatic discharge.
-
- Cushioned transport: Place network gear in padded crates or cases with shock absorbers.
-
- Separate high-value items: Firewalls and core switches should be hand-carried by trusted staff, not shipped with bulk equipment.
- Chain of custody: Maintain a record of who is handling critical gear at each stage.
-
Cable and Peripheral Handling
Cables may not seem important, but missing or damaged cables during reinstallation can delay the entire relocation.
-
-
- Coil and bag cables by type: Separate copper, fiber, and power cables into labeled bags.
-
- Protect fiber optic cables: Use hard cases for long fiber runs to avoid microbending damage.
-
- Include spares: Always transport 10–20% spare cables in case of loss or damage.
- Keep power cords matched: Server-specific power cords should be packed with their devices.
-
Security During Transit
Your IT equipment contains sensitive corporate and client data. Even if drives are encrypted, physical theft or tampering poses serious risks.
-
-
- GPS-tracked vehicles: Use professional movers with vehicle tracking.
-
- Escorted transport: Have IT staff escort high-value racks or servers.
-
- Insurance coverage: Confirm movers carry IT relocation-specific insurance policies.
- Secure stops: Avoid leaving trucks unattended, even for short stops.
-
Example: During an overnight move between two data centers, a logistics company used a dual-driver system with GPS tracking to prevent theft or delays.
Phase 4: Reinstallation at the New Site
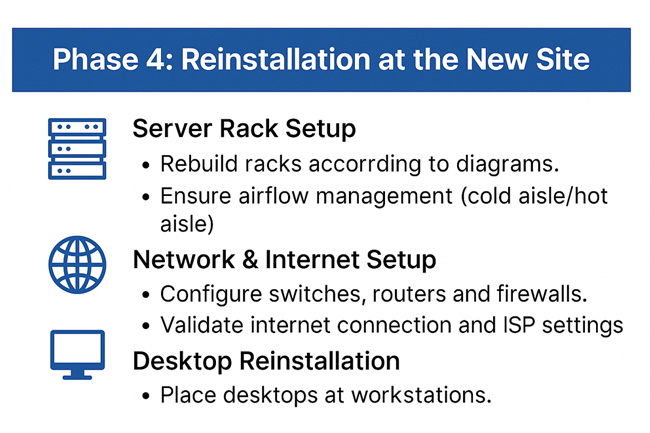
Once the equipment reaches the destination, the priority is to restore the IT environment quickly and securely. This phase focuses on server rack setup, network configuration, and workstation readiness so that business operations resume with minimal disruption. Careful reinstallation prevents downtime, ensures proper airflow for cooling, and verifies that every device is connected as planned.
Server Rack Setup
Server racks form the backbone of your IT infrastructure, so precision during setup is critical.
-
-
- Rebuild racks according to diagrams: Use rack elevation diagrams created during planning to reinstall equipment in the correct order. Consistency reduces troubleshooting time.
-
- Ensure airflow management: Arrange servers and network devices in hot aisle/cold aisle orientation to maintain efficient cooling and avoid overheating.
-
- Connect power via UPS or PDU: Plug servers and switches into uninterruptible power supplies or rack-mounted power distribution units for stable and redundant electricity.
- Patch fiber and copper connections: Follow the documented patch panel layout when reconnecting cables. Proper labeling ensures that every port is mapped correctly.
-
Example: A healthcare provider in Mississauga reinstalled racks by using pre-documented elevation diagrams. This avoided confusion and cut reinstallation time by 40%.
Network & Internet Setup
Once the racks are physically assembled, the network layer must be configured. This ensures that internal systems and external connectivity are restored without delay.
-
-
- Configure switches, routers, and firewalls: Apply pre-tested configurations to switches and security appliances. This guarantees that VLANs, ACLs, and routing rules are enforced from day one.
-
- Test internal connectivity: Verify communication between servers, storage, and user devices inside the LAN. Use ping tests and traceroutes for validation.
- Validate internet connection: Check with your ISP that the external line is active and configured with the correct IP addresses, gateways, and DNS settings.
-
Without this step, even if devices are powered up, employees may face outages due to routing errors or firewall misconfigurations.
Desktop Reinstallation
Workstations are where employees interact with business applications. Setting them up properly ensures staff can return to productivity quickly.
-
-
- Place desktops at workstations: Each desktop should be installed at its assigned workstation or cubicle. Correct placement avoids user confusion.
-
- Reconnect cables using pre-labeled sets: Use the labeled bundles from the old site to reconnect monitors, peripherals, and power. This saves hours of guesswork.
- Test monitor resolution, network access, and VOIP phones: Ensure each desktop runs at optimal resolution, has network connectivity, and the VOIP handset registers successfully with the PBX or cloud system.
-
Example: An insurance company in Brampton labeled each workstation’s cable set. On reinstallation day, their team restored over 120 desktops in less than 6 hours with zero misplacements.
Final Validation and Testing
Before declaring the relocation complete, a full round of testing ensures all systems are live and reliable.
-
-
- Run system health checks: Confirm CPU, memory, and storage performance on critical servers.
-
- Test application access: Validate ERP, CRM, and email services are available to staff.
-
- Verify redundancy: Ensure backup power, failover internet, and redundant links are operational.
- Get user confirmation: Ask department heads to sign off after testing their core applications.
-
This step reduces the risk of post-move surprises and gives leadership confidence that IT operations are stable.
Phase 5: Testing and Validation
The final phase ensures that everything is functional and ready for day-to-day business use.
System-Level Testing
Applications must be tested before employees return to work. Verify that ERP systems, email servers, and databases are running. Authentication systems like Active Directory or SSO should be tested to confirm user login access.
Performance Validation
Run network speed tests to ensure performance meets pre-move benchmarks. Use monitoring tools to check switch utilization, error rates, and VOIP latency. This ensures that performance is not degraded at the new site.
Staff Support
Provide onsite IT support for at least the first business day after the move. Walk employees through login processes and resolve workstation issues. Record any reported issues during the first week and assign follow-up tasks to resolve them.
Best Practices for a Smooth Relocation
-
-
- Always back up data before beginning.
-
- Label everything for faster reinstallation.
-
- Test at every stage, not just the end.
-
- Keep downtime communication clear and realistic.
- Use experienced IT relocation partners if the move involves complex server environments.
-